XpatAthens

XpatAthens

Friday, 20 February 2015 16:52

Ekmek Kataifi Recipe

Although, this is not an original Greek dessert - I believe it originally hails from Turkey, this fabulous dessert has been enjoyed throughout Greece for quit some time. Traditionally, the dessert Ekmek is made with a base of ‘Kataifi’ pastry.  This pastry resembles angel's hair pasta or vermicelli as it is cut into very thin strands.


Ingredients

Pastry Base Ingredients:
1/2 kilo kataifi pastry dough  
1/2 cup melted unsalted butter

Syrup Ingredients:
1/2 cup sugar
1/4 cup water
1 cinnamon stick
1 tsp. fresh lemon juice

Custard Ingredients:
7 egg yokes
6 cups milk
1 1/2 cup sugar
7 tbsp. fine semolina flour
2 tbsp. corn flour
grated rind of 1 lemon
1 tsp. vanilla

Topping Ingredients:
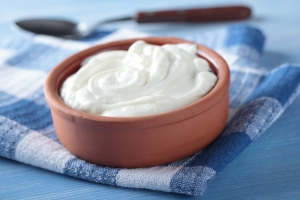
2 cups sweetened whipping cream
1 tsp. vanilla 


Heat your oven to 190C. Butter a 30cm  pan.  Make sure it’s a deep one so it will accommodate the layers of pastry, custard and cream. 

Make the base.  Take the Kataifi pastry and pull the strands apart so it lays light and fluffy on the bottom of the pan.  Brush the pastry with the melted butter then put it in the oven to toast.  Just a few minutes should be enough, as you want it golden brown. 

Make the syrup.  In a small saucepan, boil the sugar with the water and cinnamon stick. You only need to boil it until it thickens a bit, but if you prefer thicker syrup, just keep boiling off the water.  Be careful though, you don’t want the syrup to burn or caramelize.  When it’s thick enough for your preference, remove from the heat and stir in the lemon juice.  Pour the hot syrup over the toasted pastry base.

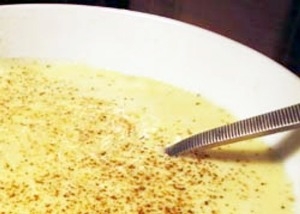
Make the custard.  In a medium saucepan, beat the sugar and the egg yokes together.  Slowly add the semolina flour, milk, and the corn flour, alternating them until all are incorporated.  Move the pan to medium heat and cook this custard, stirring constantly.  Again, be careful, you don’t want to scorch it, so keep right over it and stir continuously.  When the custard thickens, remove from the heat.  Beat in the vanilla and the lemon rind then pour the custard over the syrup/pastry base. 

Let the whole thing cool completely before you add the final topping.  If you like, you can refrigerate it overnight and make the topping the next day.  

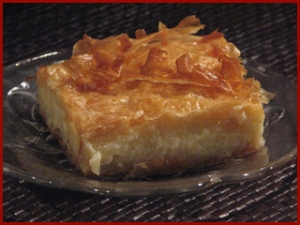
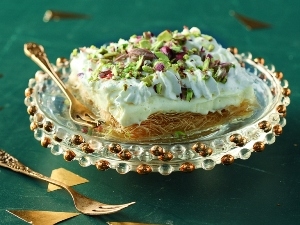
Make the Topping.  Beat the whipping cream with the vanilla until its stiff.  Spread this over the cooled custard/pastry and there you have it.... Ekmek!!  You can garnish the Ekmek with maraschino cherries, chopped almonds, whole pitted dates, or whatever takes your fancy. 

By Susie

faliraki-info.com

Braises like this are perfect for meat with tough muscle tissue and tendons (which come from the part of the animal that works hard), a great example of poverty cooking. This less expensive cut of meat develops its own natural and luscious sauce as it cooks. You want a little marbling in the meat, because it melts down as you cook and adds a lot of flavor to the sauce. You can use brisket, shanks, shoulder – all fairly tough meats – but save the filet mignon for the grill or a pan. It takes a little time to cook and become tender, but it’s a relatively easy setup, and once you get it onto the stove you don’t have to worry about it for about an hour.
So you can do your laundry, or walk the dog, or make a salad.

• A couple of days later, if you have any leftovers, you can shred the meat, then return the meat to the sauce and add your favorite pasta. The resulting dish is a Greek version of beef stroganoff.
• The herbs are very important to the flavor development here, since I’m using water instead of stock, so use fresh herbs if possible.

Serves 4 to 6 family-style with potatoes, rice, or orzo

Ingredients:

• 3 tablespoons blended oil (90 percent canola, 10 percent extra-virgin olive)
• 2 pounds beef stew meat, cut into 1 ½ – inch chunks
• Kosher salt and cracked black pepper
• ½ large Spanish or sweet onion, finely chopped
• 1 carrot, finely chopped
• 1 stalk celery, finely chopped
• 1 large leek, cut into thick rounds, washed well in cold water, drained
• 2 tablespoons tomato paste
• ½ cup red wine
• 2 tablespoons red wine vinegar
• 3 to 5 cups water
• 1 fresh bay leaf or 2 dried leaves
• 1 large sprig rosemary
• 1 sprig thyme
• 1 sprig sage
• 2 cinnamon sticks
• Extra-virgin olive oil
• Grated orange zest
• 1 tablespoon roughly chopped parsley

Method:

Place a large, heavy pot or Dutch oven over medium-high heat and add the blended oil. Season the beef aggressively with kosher salt and pepper. When the oil is hot, add the beef and sear on all sides, 5 to 6 minutes. Add all the chopped vegetables to the pan with the beef and sauté for 2 minutes. Add the tomato paste and stir for 1 minute. Deglaze the pan with red wine and red wine vinegar, and let them reduce completely away.

Add 3 cups of the water, 2 teaspoons salt and a generous grinding of pepper, the bay leaves, rosemary, thyme, sage, and cinnamon. Bring to a boil, then reduce the heat to low and partially cover the pan. Simmer gently for about. Check and, if the mixture is dry, add another cup or two of water. Keep simmering for 15 to 40 minutes more, until the meat is tender and the braising liquid has reduced to a saucy consistency. Remove the bay leaves and cinnamon sticks. Transfer to a platter and drizzle with a little extra-virgin olive oil, and scatter with a little orange zest and the parsley.

www.michaelpsilakis.com
 
Friday, 20 February 2015 16:50

Savoury Cake With Kasseri Cheese And Herbs

Very tasty snack for the school, the picnic or the office or for those lazy Sunday morning breakfasts. It can also be served as a light meal along with a green salad and a few dollops of Greek yoghurt. Easy to prepare with simple ingredients, it will make your day!
 
Ingredients (for 6-8 portions):

1½ tea-cup of all-purpose flour
4 eggs
2 tea-cups of Greek Kasseri cheese, grated (or mild English yellow cheddar)
4 tbsp of olive oil
1/2 a bunch of fresh spearmint, only the leaves finely chopped (or 1 tbsp of dried, ground)
1 tsp of dried oregano, ground
1 pinch of ground nutmeg
1 pinch of salt
1 pinch of black pepper
5-6 sundried tomatoes, finely chopped (from a jar in oil)
1 sachet of baking powder
100ml of full fat fresh milk

Method:

Preheat the oven to 180° C and place the rack at the lowest position of the oven. Lightly grease the bottom and the sides of a long loaf or cake tin (I prefer the non-stick ones).

In a small bowl mix together the flour with the baking powder.

In a large bowl beat with a whisk the eggs with the milk and the oil until they are well blended. Add the cheese, the herbs, the nutmeg, the tomatoes, salt and pepper and mix well with your hand.

In the end add the flour/baking powder mixture and mix until the ingredients come together. The mixture should be thick, resembling that of a classic sweet cake.

Empty the mixture into the tin and put in the oven. Bake for about 40 minutes. Check the cake out with the classic method of inverting a knife in the middle of it – if it comes out clear and dry then it is ready. Otherwise, bake for a few more minutes and try again.

Take out of the oven and leave the cake to stand in the tin for a few minutes. Turn out onto a plate and serve cut in slices. This type of cake can be served even cold but it is always tastier if it is still lukewarm.

Recipe by Angelos Rentoulas from "Gastronomos" magazine of "KATHIMERINI" newspaper

www.amateurcookprofessionaleater.blogspot.be

"But how are you even Greek?" is the reaction I always get when I tell people I don't like figs. I know, I know, how am I even Greek when I don't eat the fruit of the gods, the humble fig? So prominent is it in Greek cooking, figs are making a culinary comeback, used more and more not just in sweet dishes but in savoury. And dried, preserved or sweetened they are delectable enough, but just freshly picked off a tree they can reduce grown men to tears - I've seen it with my own eyes.

And no wonder - in Greek mythology figs are associated with Bacchus, also known as Dionysus, the god of wine and song. Yet this very ancient and biblical fruit is making a resurgence in modern times.

A fig tree is said to appear in some images of the Garden of Eden, giving a religious connotation to this Grecian delicacy. Figs are mentioned in the Christian Bible, but not only that, the Muslims' Koran, and the Jewish Torah. The early Greeks so highly prized figs that it was considered an honour to bestow upon the winner of various competitions both the foliage and fruit of a fig tree. And when modesty became popular in ancient times, the private parts of Greek statues were covered with fig leaves. This also comes from the religious belief Adam and Eve covered their nakedness with leaves that are usually said to be from the fig tree after they ate the forbidden fruit. Even some religious scholars believe the forbidden fruit was in fact a fig. Also, in Greek mythology, when Zeus was pursuing Ge and her son, Sykeus, in the war of the Titans, in order to save her son, Ge metamorphosed into a fig tree.

Figs enjoy a Mediterranean climate that has a long, hot, dry summer, that's why they are so commonly found in Greece and Italy and feature heavily in both cuisines. The fig tree can live as long as 100 years and grow to 100 feet tall, although domestic trees are kept pruned to a height of about 16 feet. There are hundreds of varieties of figs, ranging in colour from nearly black to almost white, and only the female fruits are edible. The green varieties are normally reserved for drying.
The shelf life of fresh figs is brief indeed. They must be picked ripe from the trees as they do not ripen well once picked. A very firm fig is not ripe and will not properly ripen further. Snatch them up and use them as soon as you find them in the market as they will spoil within seven to ten days of harvesting. In most cases this means you have about three days at most to use them at home. Select figs that are clean and dry, with smooth, unbroken skin. The fruit should be soft and bouncy to touch, but not mushy and overripe. Use your nose when picking figs and smell the fruit. If it smells slightly sour, it has already begun to ferment. The fruit is sweet to taste and in ancient times, was used a sweetener before refined sugar. And given they are among the richest plant sources of calcium and fibre you can rest assured you are doing your body a good deed by indulging in figs.

But even though there is a short window to indulge in fresh figs, figs as a fruit can be consumed all year round. Dried figs are readily available - and many varieties and brands are imported from Greece to Australia for consumption here. Also, figs can be made into jams, and preserved for savoury dishes or as spoon sweets to enjoy with coffee. There are also biscuits readily available filled with a fig jam. Fresh and dried figs are also perfect for breakfast. Mixed in with Greek yoghurt and honey it makes a nutritious breakfast option. Preserved figs are great to include in muesli and of course, fig jam is perfect on a toasted piece of sourdough.

By Penni Pappas

http://neoskosmos.com

So I have done A LOT of travelling in the past 3 years (visiting over 30 countries around the world), and Greece was one of my favorite places I visited. (And Greek rice stuffed peppers were a favorite I found) Greece was pretty incredible and unexpected as I had never seen anything other than photos of ancient ruins or the white and blue houses of Mykonos on postcards. I went on a 2 1/2 week journey back in August and September of 2010 and visited many different places in Greece.

I saw the ruins of Athens, the rocky shorelines and picturesque houses of Mykonos, the rolling hills and mountains of Naxos, The Palace of the Grand Masters of Knights in Rhodes, the mesmerizing Balos Lagoon and Palace of Knossos on Crete, and the Tholos of Athena Pronaia Sanctuary and Oracle at Delphi.

In my time in Greece I learned that there was much more than just olive oil and seafood to Greek cuisine. Traditionally the Greeks and Cretans ate vegetables, grains, fruits, seafood and olives. In fact their diet was vastly healthier eating homemade unprocessed food, unlike what they do now (which is more like a SAD Westernized diet drenched in copious amounts of olive oil and wine).

So what I took from my travels was using vegetables, grains and herbs in a way that complimented each other to bring out the full flavor of simple vegetable based dishes. The Greek rice stuffed peppers served in Greece are generally stuffed with ground meat as well, but occasionally I found some that were vegan without meat. Mykonos served some at the beach cafes and a Taverna in Delphi had some as well. But these versions used white arborio rice (Italian risotto rice) and were drenched in olive oil.

For my version I decided to switch to whole grain brown rice and remove the olive oil (for health purposes dousing all vegetables in olive oil isn’t recommended). So while it’s not “traditional” it is still very rustic and delicious. I’ve packed it full of dill, parsley and lemon juice so you get all the flavor of the full fat version but without the extra calories.

This recipe is featured in my cookbook Vegan Comfort Foods From Around The World which is available in a digital or physical version wherever you are in the world.

In fact it’s probably my family’s favorite recipe, my mom and even my friends make this recipe regularly as an entree for omnivores and they always receive rave reviews. So it makes me happy that something so simple can be delicious and satisfying to people on a wide variety of diets.

So scroll down for the recipe and get cooking!

Prep Time: 

30 min Total Time: 1 hour 20 min

Yield:

Serves 3-4 for entrées or 6-8 as a side dish

Ingredients

6 large or 8 small bell peppers (any color but green)
1 large onion, diced
3 medium carrots, peeled and diced
3 small zucchinis, peeled and diced
1 cup / 236 ml. vegetable broth
3 cups cooked brown rice
5 Tbsp. tomato paste
3/4 cup whole fresh parsley, de-stemmed and chopped
3/4 cup whole fresh dill, de-stemmed and chopped
1/2-1 lemon, juiced
1/4 tsp. fresh ground pepper
3/4 tsp. Herbamare or salt (or to taste)
1 lemon—cut into wedges (optional)

Directions

Preheat oven to 350 F /175 C. Cut tops off of peppers like you would a jack-o-lantern,
remove seeds, and wash thoroughly.
Place in an oven safe dish arranged upright and put tops back on. Bake for 30 minutes.
Meanwhile, in a large pan, saut. onions, carrots and zucchini in vegetable broth for 5-6 minutes.
Stir in the rice and tomato paste and coat thoroughly.
Add parsley, dill, lemon juice, pepper, and Herbamare or salt and stir to combine.
When peppers are ready, remove from oven and fill with stuffing.
Place tops back on peppers and bake for an extra 30-40 minutes until peppers are soft.
Serve additional wedges of lemon if desired.

Additional Tips

Don’t use green peppers. Green peppers are unripe and much harder. They will not be done in time if you cook them along with red, yellow or orange peppers. Additionally you can substitute white rice for the brown if you like.

Nutrition Facts: 6 Servings

Amount Per Serving

  • Calories 170.9
  • Total Fat 1.4 g
  • Saturated Fat 0.3 g
  • Sodium 325.7 mg
  • Total Carbohydrate 37.1 g
  • Dietary Fiber 5.6 g
  • Sugars 3.6 g
  • Protein 4.4 g

By Low Fat Vegan Chef Veronica

lowfatveganchef.com


Eat it straight or use it to enhance a dish, but learn how to cook with Greek yogurt properly! While we love it straight from under the parchment, cooking with Greek yogurt is another way to incorporate it into your diet. To avoid congealey failure and maximize delicious success, follow these tips.

Don'ts:

• Don't expect it to act just like regular yogurt - chiefly, don't bake with it unless it's thinned out and don't heat it quickly or the concentrated milk proteins will separate from the remainder of the whey, never to unite again. Temper it before adding it to a warm dish, and only then, right at the end.
• Don't try to make it before you've mastered regular yogurt, straining three times requires more effort and planning than you might think. Cool tip: big coffee filters.


Do's:

• Do substitute Greek yogurt for buttermilk or heavy cream, two things you might not readily have in your fridge (who has buttermilk in their fridge?) Just water it down slightly to match the consistency.
• Do put it in your ice cream maker, it freezes faster and creamier than regular yogurt. Plus the healthy bacteria will even survive a freezing!


To read more, please visit foodrepublic.com

Author: Jess Kapadia

Friday, 20 February 2015 16:45

Diples Recipe

Made with some ladies at Penelope’s house in Stoupa, diples are made in very large quantities in Greece and offered at celebrations: weddings, baptisms, the opening of a new shop or moving house. Women always work in groups when they can be making upward of 300 or more. They also keep in an airtight container for months!


Ingredients

3 eggs
55 g (¼ cup) sugar
300 g (2 cups) plain flour
1 tbsp oil, to oil hands
extra virgin olive oil, for frying

Syrup

350 g (1 cup) honey
220 g (1 cup) sugar
3 tsp orange juice
125 ml (½ cup) water
½ cinnamon stick
2 cloves

To serve

ground walnuts
sugared almonds
edible flowers
ground cinnamon

Instructions

Resting time: 30 minutes

Whisk the eggs vigorously until pale. Add sugar and continue whisking until the sugar is dissolved. Slowly add the flour, whisking constantly, until a dough forms. Oil your hands and knead the dough until smooth. Wrap in plastic wrap and rest for 30 minutes.

Divide the dough in half. Roll each half until thin or else use a pasta machine. To test if it is thin enough, when you lift a corner of the dough and gently blow under it, it should lift. Using a serrated pastry cutter, cut the dough into 8 cm x 10 cm strips. Pinch the two sides of each strip together at 2-3 cm intervals and pull into circles, squeezing together to make firm. They will look like frilly rosettes. A much simpler way is to roll the dough out the width of a pasta machine (approx. 13 cm) and then cut into lengths of around 12 cm.

Heat extra virgin olive oil in a large, wide frying pan to a depth of 7 cm. Drop the prepared rosette diples in the pan a couple at a time and cook until a gentle golden colour, rolling over to cook both sides. If you are using the flat shapes, hold one edge with tongs and place in the hot oil. As they start to puff, roll into cylinder shapes. This can be done with another pair of tongs or in Greece they use a long carving fork and a spatula. Drain on paper towel.

Place syrup ingredients in a large saucepan and cook over low heat until hot.  Dip the diples in hot syrup, making sure they are completely coated. Drain.

Serve diples decorated with ground walnuts, sugared almonds and edible flower petals, dusted with cinnamon.

Cook's notes

Oven temperatures are for conventional; if using fan-forced (convection), reduce the temperature by 20˚C. | We use Australian tablespoons and cups: 1 teaspoon equals 5 ml; 1 tablespoon equals 20 ml; 1 cup equals 250 ml. | All herbs are fresh (unless specified) and cups are lightly packed. | All vegetables are medium size and peeled, unless specified. | All eggs are 55-60 g, unless specified.

By Lyndey Milan

www.sbs.com.au

Friday, 20 February 2015 16:45

Dinner Tonight: Avgolemono

With some chicken stock in the freezer and a pile of lemons, I set out to see what the hype was about (this recent cloudy weather made it all the more appealing). Some orzo or rice is simmered in the stock until tender, and in the meantime the egg whites are whipped separately, the yolks and lemon juice added, followed by some of the warmed stock.

By throwing the whisk around like a madman, I was able to achieve the soup's unique alchemy: the eggs, rather than stiffening and cooking into a scramble-like mess, turn the soup creamy and rich. It also softens the acidity of the lemon, which leads off the flavor profile, followed by "richness of eggs, salt of chicken [stock], and starch of rice, in that order." This one's going in my regular Winter rotation.

Ingredients

8 cups chicken stock, preferably homemade, if not, low sodium
1 cup orzo pasta, or rice
4 eggs, separated
Juice of 3 lemons
Freshly ground black pepper

Procedure

1 Bring stock to a boil and add orzo or rice. Simmer until tender, about 20 minutes. Season stock to taste with salt, if necessary.

2 When the orzo or rice is nearing tenderness, whisk the egg whites in a separate bowl until medium peaks. Add egg yolks and lemon juice, whisking continuously.

3 When the orzo or rice is finished, transfer 2 cups of the hot stock to the egg/lemon mixture, adding very slowly in a constant stream and beating vigorously to prevent the eggs from solidifying.

4 Take the soup off the heat and add the beaten mixture back into the pot, whisking to incorporate. Serve immediately with freshly ground black pepper.

To read more please visit seriouseats.com

Friday, 20 February 2015 16:40

Traditional Pies From Ikaria (Pitarakia)

These traditional pies, so called "poor", are in fact full of flavor and exceptionally healthy. They are one of the most popular, traditional foods of Ikaria.

For the dough

4 1/2 cups flour
1 scant tsp salt
4 tbsp olive oil
1 tbsp vinegar
300 gr. water

For the filling

1 pumpkin, about 1 ½ kg, peeled and diced
4 onions, chopped
½ cup olive oil
1 bunch of fennel, chopped
1 bunch of mint, chopped
1 cup of fresh oregano, chopped
Salt and pepper

Prepare the dough


1. In a bowl or mixer bowl, combine the flour with the salt. Then, add the oil, the vinegar, and the water. Mix until the ingredients are very well combined.

2. Knead the dough for about 10 minutes, adding flour or water until the dough is smooth and not sticky. Cover the bowl with plastic wrap and set aside for at least one hour before using it.

Prepare the filling


1. Preheat the oven to 180°C.

2. Place the pumpkin in a shallow baking pan, lined with parchment paper. Bake for 20 - 25 minutes until softened and all liquids are absorbed.

3. Cook the onion in a large, heavy, dry saucepan, over low heat, for 8-10 minutes, without adding any oil, until it produces its own liquid and gets softened.

4. Add the oil and turn off the heat.

5. Transfer the pumpkin to the saucepan with the onion. Add salt, pepper and the herbs. Stir and set the mixture aside to cool.

Prepare the pies

1. Divide the dough into 4-5 equal balls. Flatten a bit with the palms of your hands. Then, flour a working surface and roll them out to thin sheets.

2. Cut into squares, fill each square with about 1 tbsp filling, wrap the sheet so as to form oblong rolls, and place in oiled baking pan.

3. Bake in the oven for about 12-15 minutes or until golden colored.

Serve warm, at room temperature.

greek food - greek cooking - greek recipes by diane kochilas http://www.dianekochilas.com/

This custard pie is my absolute favorite Greek dessert. If you can get past the tongue twister name, Galaktoboureko (gah-lahk-toh-BOO-reh-koh) can easily become your favorite Greek pastry as well. It’s a divine combination of creamy custard and flaky phyllo dough that is baked to golden perfection then drenched with a lemon and orange infused syrup.

The only caveat is that this dessert is best served the same day it is made. Once refrigerated, the custard tends to harden and loses its lovely texture.

Ingredients

For the filling:

• 6 cups milk
• 1-1/4 cup fine flour
• 6 egg yolks
• 1/2 cup sugar
• 1 tbsp. vanilla extract
• 2 tbsp. unsalted butter

For the syrup:

• 1 cup sugar
• 1 cup water
• 5 cm piece of lemon rind
• 5 cm piece of orange rind
• Juice of 1/2 a lemon
• ½ kilo phyllo pastry sheets
• ½ kilo unsalted butter, melted (for brushing)

Preparation:

Make the Filling: In a large saucepan, heat the milk over medium high heat until just boiling. Add the flour and stir with a whisk. Lower the heat to medium low.
Using a whisk, beat the egg yolks with the sugar. Ladle a cup of the warmed milk into the egg mixture to temper and then add the egg yolk mixture to the pot.
Continue to cook over medium low heat until the cream starts to thicken, stirring continuously.

When the custard has thickened, remove from heat and stir in the vanilla extract and the butter. Set aside.

Unwrap the Phyllo: Carefully remove the Phyllo roll from the plastic sleeve. Using a pair of scissors or sharp knife, cut the sheets in half to make two stacks. To prevent drying, cover one stack with wax paper and a damp paper towel while working with the other.

Preheat the oven to 350 degrees.

Assemble the Galaktoboureko: Using a pastry brush, brush the bottom and sides of a rectangular pan. You will use approximately half the phyllo sheets for the bottom of the pastry. Begin by layering sheets one by one in the bottom of the pan, making sure to brush each one thoroughly with melted butter.

When you have almost layered half the sheets, drape two sheets of phyllo so that they extend half in the pan and half out of the pan horizontally. Add the custard in an even layer on top of the sheets, smoothing the surface with a spatula. Fold the phyllo sheet flaps in over the custard layer. Add the remaining sheets on top, brushing each sheet with melted butter.

Before baking, score the top layer of phyllo (making sure not to puncture the filling layer) to enable easier cutting of pieces later. I place the pan in the freezer for about 10 to 15 minutes to harden the top layers and then use a serrated knife.

Bake in a preheated oven for 45 minutes or until the phyllo turns a deep golden color.

While the Galaktoboureko is baking, prepare the syrup: Combine the sugar and water in a saucepan and add the lemon peel and orange peel. Boil over medium high heat for approximately 10 – 15 minutes. Remove the lemon and orange peel and stir in the lemon juice. Remove from heat and set aside to cool.

Prep Time: 45 minutes, Cook Time: 45 minutes

Total Time: 1 hour, 30 minutes, Yield: Approximately 24 pieces

Caution: Do not pour hot syrup over the hot custard. Allow both to cool to room temperature and then carefully ladle the syrup over the galaktoboureko and allow time for it to be absorbed.

To read more, please visit greekfoodabout.com

Page 370 of 437