XpatAthens

XpatAthens

Friday, 20 February 2015 19:43

Deep Fried And Good For You

Fried food is probably not on anyone’s lists of healthy eats, but you have to start with this: Fat is good for you.The long-lived people of Crete might not drink a glass of olive oil a day, but they consume three times as much as we do, and that’s probably more desirable than our misguided notion that the less fat you eat, the better.

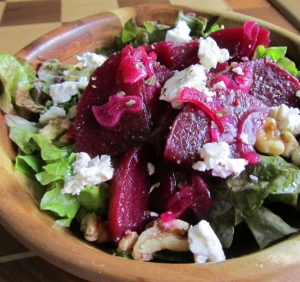
There are differences among fats, of course, but with trans-fats in full retreat and lard and butter making comebacks, the whole fat-eating thing is starting to make some sense. Of course, the key word is moderation. You can eat fat as long as it’s high quality and you don’t eat it to the exclusion of plants.

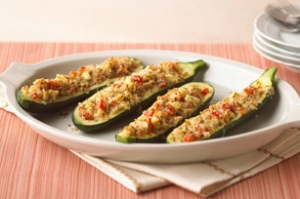
That’s one reason you shouldn’t reject deep-frying at home; I do it about once a month. The second reason is that you know you love it. The third is that it can be fast and easy. The fourth is that you can deep-fry plants. (And anything else.)

Frying is thought of as messy, but this can be mitigated by the simplest of measures: using a pot that is heavy, broad and deep, like a well-made stockpot. Choose this, add a fair amount of oil and the process is simplified and neat.

Which oil? How much? Since most deep-frying is done at around 180 degrees Celsius, this whole notion that olive oil is inappropriate for frying is nonsense; it smokes at 190 (and smoking isn’t the end of the story, either). So olive oil — especially “pure,” which is a step below extra-virgin and in theory less expensive — is a fine option, especially for something in which you’d like its flavor, which could include any of the recipes here.

Unless, that is, you’re seasoning tempura with soy sauce, in which case you might choose peanut oil, which is as flavorful as olive oil, but obviously different. The third excellent option is grapeseed oil, which is as close to neutral as you can find.

None of these is as inexpensive as vegetable oil, or soy, or corn or Wesson. And if you don’t have problems with chemical extraction, you might choose one of them; they are, after all, what is used for nearly all commercial deep-frying. If, however, you can afford it and you want the best possible frying experience, use one of those three mentioned above, or at least a cold-pressed neutral oil like safflower or sunflower.

Money is an issue, since on the face of it, frying isn’t cheap. When it comes to the “how much” question, I’d say around 6 cups is probably enough in most cases.

But more is generally better, and you can reuse the oil quite a few times for deep-frying, stir-frying or sautéing, as long as you strain out most solids — and you need not be fanatic about this; a quick run through a strainer is fine — and keep it in the refrigerator. (You might consider keeping oil you’re not using in the near future in the refrigerator anyway; rancidity comes from heat and light and it’s nasty. If you have an old bottle of oil sitting around in your kitchen, smell it; you’ll probably throw it away.)

The goal of frying is to crisp the outside perfectly and cook the inside just enough, while keeping the whole package from absorbing more than a bit of oil. Most of this happens magically, as long as you follow the rules, which I’ll get to in a second. There are three or four levels of protection you can give the interior, and all of them become satisfying crusts — again, as long as everything goes right.

The first layer of protection is the stuff itself: you allow the outside of the food you’re cooking to become the crisp part (that’s like a French fry, or falafel or “naked” fried chicken). Then there’s the second layer: a light dusting of cornmeal, flour or the like (I like this with fried squid or fried chicken, especially when seasoned heavily with black pepper). Then a fluffy coating, like tempura or a doughy, pancake-like batter (the latter, it seems to me, is often — perhaps usually — overkill). And finally, the old flour, egg and bread crumb treatment, which is, well, yum.

They’re all pretty much appropriate for anything. You choose the food you want to fry, you choose the coating, you follow these general instructions and it’ll work.

Start by putting at least two inches of oil in a heavy and, as I said, deep pot. Less than two inches and you may not be deep-frying; it’ll work, but you might have to turn the food more often, it might stick to the bottom a bit and it might cook less evenly.

Turn the heat to medium or medium-high and go about your business. Part of that business might be finding a thermometer, because you want that oil to be between 350 and 365 in almost every instance. The heavy pot will help keep that temperature stable.

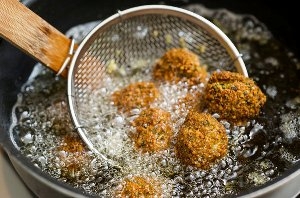
You don’t have to have a thermometer, though, because there are a couple of other ways to know when the oil is ready. It’s just about right when a pinch of flour sizzles without burning immediately; that’s not super-accurate, but if you then add a single piece of food and it first sinks a bit and then immediately rises to the top, the oil is perfect. If it sits on the bottom like a flounder, the oil isn’t hot enough; if it doesn’t sink at all the oil is too hot. The oil is also too hot if it’s smoking.

Add your food in batches and don’t crowd; you do not want the temperature to plummet, nor do you want the pieces of food nestling against one another. (Though it’s fine if they bump.) You may or may not have to turn the pieces, but that’s easy, because they’ll be floating and they won’t stick. Remove them with a slotted spoon, tongs or spider; you’ll know when they’re done because the color will be evenly gorgeous.

Take it slow and either eat the food as it comes out of the fat (you can drain on paper towels or, if you want to be fancy, a cloth napkin) or keep it warm for as little time as possible in a low oven. Myself, I like to fry when people are standing around eating the food as fast as I can produce it; that is really fun. And good for you.

By Mark Bittman

www.nytimes.com


Friday, 20 February 2015 19:42

The Benefits Of Beets

Beetroots, whether roasted, steamed or raw, easily find their way into new salads, side dishes and main dishes. They are friendly with Mediterranean seasonings of all kinds: Greek, Middle Eastern, North African, Italian and Provencal. The greens are interchangeable with other mild-tasting greens like Swiss chard and spinach; one bunch of beets gives you two vegetables to work with.

With the beets and their greens you get two sets of nutrients: anthocyanins and betalains, known for their antioxidant properties, from the beetroots, and vitamins K and A, as well as other phytonutrients – lutein and zeaxanthin – from the greens. Both are excellent sources of folate, and beets are a very good source of manganese, potassium and copper.

I find that I often need greens from two bunches to have enough for a recipe, which is one reason I’m always looking for new dishes for beetroots. This week, I made three vegan salads, one with beets and their greens drizzled with a garlicky tahini dressing that I’ve always loved with typical Middle Eastern dishes like deep-fried cauliflower and falafels.

To read more, please visit nytimes.com

By Martha Rose Shulman

Friday, 20 February 2015 19:41

Aubergines Pilaf

Served plain or with yoghurt it’s simply delicious!

Ingredients

2 aubergines
1 clove of garlic, finely chopped
1 red onion, finely chopped
1/2 teacup of extra virgin olive oil
4 tomatoes, finely chopped
2 tablespoons parsley, finely chopped
1 teacup of white rice
2½ teacups of water
salt
freshly ground pepper


Method

1. Rinse and dice the aubergines into cubes. Soak them in water for 10 minutes and then squeeze well with your hands to drain the excess water.

2. Warm the olive oil and stir fry the onion for 5 minutes. Add the garlic and aubergines and stir fry for another 5-6 minutes.

3. Add the tomatoes, water, salt and pepper and simmer the sauce for 10 minutes. Then add the rice and parsley and combine everything well.  Simmer over low heat, without the lid, for 10 minutes, until the rice absorbs all the liquids and is fluffy.

4. Remove from heat, cover the casserole with a napkin and let it rest for 5-6 minutes. Serve plain or with yoghurt.


Portions 4 - Preparation Time 10 minutes - Cooking Time 20 minutes

argiro.com.gr

Friday, 20 February 2015 17:02

A Quest For Authentic Tzatziki

I was recently taking part in a recipe exchange thread online, and the subject of Greek Tzatziki came up. More specifically, one of the girls who knew that I live in Greece asked me for a tzatziki recipe. As I was away from my computer at the time, I saw her request, and the responses that followed it, a bit later. To my surprise, someone else had answered her with a recipe for that yummy tzatziki sauce…

which included mayonnaise and sour cream, and a few other things that are strangers to authentic Greek tzatziki! The responses she got to her recipe were excited affirmations that this indeed sounded like the tzatziki they’d all tried and loved in the States. I struggled with my response… Should I write back and explain that tzatziki, the way we have it here in Greece, is a very simple recipe?

I ran a quick online check for tzatziki recipes (try it yourself!) and indeed, quite a few of the recipes I found included sour cream or mayo. This made me think of the various flavored Hummus recipes you find in other countries (what? you didn’t know that original Hummus does not come in flavors such as red pepper? Well, that’s a discussion for another day!).

Tzatziki is something I take very seriously, being a very serious tzatziki aficionado. When I was much (much much) younger my family called me “miss tzatziki,” making sure to order a plate of that heavenly stuff just for me every time we went out. What’s more delicious than dipping your bread, your meat, your fries, your fried zucchini, your everything into that wonderfully-flavored yogurt? I finally decided to answer my online friends, explaining that although their version of tzatziki sounded quite yummy, real tzatziki is a very plain yogurt-garlic-salt-oil recipe that is sometimes accessorized with dill or vinegar. I decided to do so, with the hope that they’d find this delicious (and certainly healthier!) recipe satisfactory. Here is the recipe we love to make here at home, passed down from my yiayia. I hope you enjoy it, too.

If you don’t have Greek yogurt, you could strain your yogurt on some napkins overnight. Try to change the napkins often so they soak up all the ‘water’ from your yogurt.

3 cups of strained yogurt
1 small cucumber very finely grated
3-4 garlic bulbs
1/4 tsp of salt
3-4 spoons of olive oil
3 spoons of dill (optional)
splash of vinegar

Mix the yogurt, cucumber, garlic, splash of vinegar, and salt. Dill has a very strong flavor, so you could leave it out altogether or put as much as you’d like. Garnish with olive oil. Enjoy!!

This fabulous, creamy ice cream calls for gum mastic, that gives it an almost chewy texture, and salep, used as a thickening agent. Both give the ice cream a unique taste. Golden gum mastic from Chios (mastiha) is available through Greek grocers, and salep (salepi, sahlep, sahlab - a powder made from the root of an orchid plant) may be available from Greek, Egyptian, Lebanese, Turkish, or Kosher Markets. This is a smoother preparation than the Turkish dondurma.


Ingredients:

3 cups of double cream or whipping cream
3 cups of full fat milk
1 1/8 cups of sugar
3 teaspoons of salep (level)
7/8 - 1 teaspoon of golden gum mastic, ground (see below)

Preparation:

Grind the mastic: Mastic is usually sold in drops of resin which can stick to the mortar and pestle during grinding. To avoid, freeze mastic for 15 minutes before using and place it along with 1-2 tablespoons of the sugar in the mortar. Grind with the pestle.

In a mixing bowl, beat 1/2 cup of the milk with the ground mastic (and sugar used to grind) until completely blended. Dissolve the salepi in 1/2 cup of cold milk. Warm the remaining milk in a saucepan over low heat. Beating the mastic mixture at high speed, add the warm milk, then the dissolved salepi. Add remaining sugar and cream.

Transfer the mixture to a saucepan and boil over low heat for about 20 minutes, stirring frequently to prevent sticking and clumping. Remove from heat and set aside to cool to room temperature.

Ice cream maker: When cooled, transfer to ice cream maker and freeze according to manufacturer's instructions.

Without ice cream maker: Transfer to a metal container, cover with tightly fitting lid or foil and place in freezer. Every half hour, remove from freezer, transfer to a mixing bowl and beat with a hand mixer until frothy. Quickly place back in the metal container and put in the freezer. Repeat three more times.

Remove from freezer 10 minutes before serving.

Serve alone, with a syrup topping or spoon sweet, and sprinkle with chopped almonds. Kaimaki is also served with syrupy sweets like karythopita (Greek walnut cake).

Note about buying salepi: The most common form available has been premixed with sugar and other additives. The best salepi for this recipe is the pure ground orchid root if you can find it. If not, use 4-5 times the amount of salepi called for in the recipe and decrease the sugar to 1 cup.

By Nancy Gaifyllia

greekfood.about.com

Friday, 20 February 2015 16:58

Greek Cheeses

Award-winning Greek cheeses, with their unique taste, explain why in Greece the annual per capita consumption is higher than in any other European country. Soft, creamy and hard, white and yellow, fresh and mature, salty and sweet, each one a nobility, all produced with mastery and skill. Cook them, mix them, grate and sprinkle them, wine-tie them, fry them, stuff them, adore them…

Follow us in a tour to each region that has developed its own special varieties of cheese. Nothing conjures up the dreamy images of Greece better than the Aegean, home to countless islands big and small and to cooking traditions as old as Homer.

Islanders have their unique existence, defined by the deepest bond to place and familial roots, in common with one another, regardless of whether they come from places as off-the-beaten track as Ikaria or as cosmopolitan as Rhodes or Santorini.

Let’s take a tour in the Aegean, specifically in the Northeastern Aegean, where cheeses vary. Manoura from Sifnos is aged in wine dregs; Kalathaki from Limnos, a lovely basket-shaped, goat's milk white brine cheese, akin to feta, takes its name from the basket (=kalathaki) that is used to produce it.

Moving further down, we meet the Dodecanese cheeses, such as Krassotyri and Sitaka. Krassotyri is a specialty of Kos. A log-shaped, ribbed wine-soaked cheese that in recent years has begun its trip off the island. This similar wine-soaked cheeses are also produced in Nyssiros and Leros. Sitaka, one of the most unusual dairy products in Greece, is a tart, creamy spread, not unlike yogurt cheese, made from slightly fermented sheep's and/or goat's milk, which has been salted slightly and reduced over low, traditionally wood-burning fire. It is a specialty of Kassos and served with a delicious local pasta dish together with caramelized onions.

Now let’s move a little towards the Cyclades, to meet the Cyclades cheeses. . San Mihalis in Syros island, also a PDO cheese? Manoura of Sifnos’, with a pinkish hue and dark, winy aroma? Chloro from Santorini, to be eaten either fresh (and soft), or aged over pasta? You just name it!

To read more, please see visitgreece.gr

Friday, 20 February 2015 16:58

Greek 7 Layer Dip

When I came across the idea of a Greek 7 layer dip on Our Best Bites recently, I knew that I would have to add it to my snacking mix for the big football game this year. I am a huge fan of both the classic Texmex 7 layer dip and of the Greek flavours going on in this dip. In fact this Greek version of the 7 layer dip reminded me of the Greek nachos that I make that are also a fusion of Greek and Texmex.

I started the dip out with the layer of freshly homemade hummus and then I went on to replace the cream cheese layer with a layer of tzatziki made with a thick and creamy 0% Greek yogurt.

(I figured that I would be getting a lot of cream cheese in the other dips that I will be serving so I would keep this one nice and light and the tzatziki fits in with the Greek theme as well.) The next few layers are more of ingredients that are stacked on and they include some tomatoes, cucumber, red onions, Kalamata olives, feta and a touch of mint as a garnish. I strongly associate oregano with Greek cuisine and I wanted to work some in so I mixed it into the tomato layer.

Although I was expecting this dip to be good with all of the great flavours in it, I was not expecting it to be as amazing as it was! I nearly devoured the entire batch in one sitting! The combination of the creamy hummus, the tart and garlicky tzatziki, the juicy tomatoes and crunch cucumbers, the salty olives and feta was simply fantastic! In addition to being one of the most addictive dips that I have had in a while, this dip is also pretty healthy, especially when served with toasted whole wheat pitas triangles for dipping. This dip is perfect for anyone looking for a healthier alternative for snacking at any party!

(makes 4 servings)


Ingredients:
1 1/2 cups hummus
1 cup tzatziki
1 cup tomato (diced and mixed with 1 tablespoon lemon juice and 1/2 teaspoon oregano)
1/2 cup cucumber (cut into small pieces)
1/4 cup red onions (diced)
1/4 cup feta (crumbled)
1/4 cup Kalamata olives (pitted and coarsely chopped)
1 handful mint (chopped)
4 whole wheat pitas (cut into triangles and toasted until just crispy)

Directions:
1. Assemble dip starting with the hummus and stacking each ingredient on top of the last.

By Kevin Lynch

www.closetcooking.com


Friday, 20 February 2015 16:53

Stuffed Zucchini - Kolokithia Yemista

Stuffed vegetables are a staple of the summer season and this version of Kolokithia Yemista (koh-loh-KEETH-yah yeh-mee-STAH) or Stuffed Zucchini is a great way to enjoy the bounty.The zucchini are hollowed and stuffed with a savory meat filling and topped with a creamy béchamel sauce that bakes up to a nice golden crust.

Prep Time: 20 minutes


Cook Time: 1 hour

Total Time: 1 hour, 20 minutes

Yield: 4-6 servings

Ingredients:

• about 4 – 5 large zucchini (yellow or green)
• 1/4 cup olive oil
• 1 large onion, minced
• 2 cloves garlic minced
• 1kilo ground beef
• 1/2 cup chopped fresh parsley
• 1/2 tsp. dried mint
• 2 cups fresh tomatoes, seeded and diced (canned if necessary)
• 1 cup grated Kefalotyri cheese (substitute Pecorino Romano), divided
• Salt and freshly ground black pepper

For the béchamel:

• 1/4 cup butter (4 tbsp.)
• 1/4 cup all purpose flour
• 1 cup whole milk, warmed
• 1 egg yolk, lightly beaten
• pinch of nutmeg

To read more, please visit greekfood.about.com

By Lynn Livanos Athan

Friday, 20 February 2015 16:52

Ekmek Kataifi Recipe

Although, this is not an original Greek dessert - I believe it originally hails from Turkey, this fabulous dessert has been enjoyed throughout Greece for quit some time. Traditionally, the dessert Ekmek is made with a base of ‘Kataifi’ pastry.  This pastry resembles angel's hair pasta or vermicelli as it is cut into very thin strands.


Ingredients

Pastry Base Ingredients:
1/2 kilo kataifi pastry dough  
1/2 cup melted unsalted butter

Syrup Ingredients:
1/2 cup sugar
1/4 cup water
1 cinnamon stick
1 tsp. fresh lemon juice

Custard Ingredients:
7 egg yokes
6 cups milk
1 1/2 cup sugar
7 tbsp. fine semolina flour
2 tbsp. corn flour
grated rind of 1 lemon
1 tsp. vanilla

Topping Ingredients:
2 cups sweetened whipping cream
1 tsp. vanilla 


Heat your oven to 190C. Butter a 30cm  pan.  Make sure it’s a deep one so it will accommodate the layers of pastry, custard and cream. 

Make the base.  Take the Kataifi pastry and pull the strands apart so it lays light and fluffy on the bottom of the pan.  Brush the pastry with the melted butter then put it in the oven to toast.  Just a few minutes should be enough, as you want it golden brown. 

Make the syrup.  In a small saucepan, boil the sugar with the water and cinnamon stick. You only need to boil it until it thickens a bit, but if you prefer thicker syrup, just keep boiling off the water.  Be careful though, you don’t want the syrup to burn or caramelize.  When it’s thick enough for your preference, remove from the heat and stir in the lemon juice.  Pour the hot syrup over the toasted pastry base.

Make the custard.  In a medium saucepan, beat the sugar and the egg yokes together.  Slowly add the semolina flour, milk, and the corn flour, alternating them until all are incorporated.  Move the pan to medium heat and cook this custard, stirring constantly.  Again, be careful, you don’t want to scorch it, so keep right over it and stir continuously.  When the custard thickens, remove from the heat.  Beat in the vanilla and the lemon rind then pour the custard over the syrup/pastry base. 

Let the whole thing cool completely before you add the final topping.  If you like, you can refrigerate it overnight and make the topping the next day.  

Make the Topping.  Beat the whipping cream with the vanilla until its stiff.  Spread this over the cooled custard/pastry and there you have it.... Ekmek!!  You can garnish the Ekmek with maraschino cherries, chopped almonds, whole pitted dates, or whatever takes your fancy. 

By Susie

faliraki-info.com

Braises like this are perfect for meat with tough muscle tissue and tendons (which come from the part of the animal that works hard), a great example of poverty cooking. This less expensive cut of meat develops its own natural and luscious sauce as it cooks. You want a little marbling in the meat, because it melts down as you cook and adds a lot of flavor to the sauce. You can use brisket, shanks, shoulder – all fairly tough meats – but save the filet mignon for the grill or a pan. It takes a little time to cook and become tender, but it’s a relatively easy setup, and once you get it onto the stove you don’t have to worry about it for about an hour.
So you can do your laundry, or walk the dog, or make a salad.

• A couple of days later, if you have any leftovers, you can shred the meat, then return the meat to the sauce and add your favorite pasta. The resulting dish is a Greek version of beef stroganoff.
• The herbs are very important to the flavor development here, since I’m using water instead of stock, so use fresh herbs if possible.

Serves 4 to 6 family-style with potatoes, rice, or orzo

Ingredients:

• 3 tablespoons blended oil (90 percent canola, 10 percent extra-virgin olive)
• 2 pounds beef stew meat, cut into 1 ½ – inch chunks
• Kosher salt and cracked black pepper
• ½ large Spanish or sweet onion, finely chopped
• 1 carrot, finely chopped
• 1 stalk celery, finely chopped
• 1 large leek, cut into thick rounds, washed well in cold water, drained
• 2 tablespoons tomato paste
• ½ cup red wine
• 2 tablespoons red wine vinegar
• 3 to 5 cups water
• 1 fresh bay leaf or 2 dried leaves
• 1 large sprig rosemary
• 1 sprig thyme
• 1 sprig sage
• 2 cinnamon sticks
• Extra-virgin olive oil
• Grated orange zest
• 1 tablespoon roughly chopped parsley

Method:

Place a large, heavy pot or Dutch oven over medium-high heat and add the blended oil. Season the beef aggressively with kosher salt and pepper. When the oil is hot, add the beef and sear on all sides, 5 to 6 minutes. Add all the chopped vegetables to the pan with the beef and sauté for 2 minutes. Add the tomato paste and stir for 1 minute. Deglaze the pan with red wine and red wine vinegar, and let them reduce completely away.

Add 3 cups of the water, 2 teaspoons salt and a generous grinding of pepper, the bay leaves, rosemary, thyme, sage, and cinnamon. Bring to a boil, then reduce the heat to low and partially cover the pan. Simmer gently for about. Check and, if the mixture is dry, add another cup or two of water. Keep simmering for 15 to 40 minutes more, until the meat is tender and the braising liquid has reduced to a saucy consistency. Remove the bay leaves and cinnamon sticks. Transfer to a platter and drizzle with a little extra-virgin olive oil, and scatter with a little orange zest and the parsley.

www.michaelpsilakis.com
 
Page 369 of 436